
Setting up a tarp at your campsite can be essential in providing proper protection from rain, sun and wind.
However, not all tarp setups are the same. And, depending on the number and proximity of suitable trees, setting up a tarp can be tricky.
In this article, you’ll find out how to properly setup a tarp 3 different ways for rain, sun, or high winds – Basic Fly, A-Frame and Lean-To.
The setup methods are very simple and easy to do. Not to mention, they’re perfect for standard campgrounds, backcountry camping sites and emergency situations.
Article Contents:
Equipment Required to Set Up a Tarp
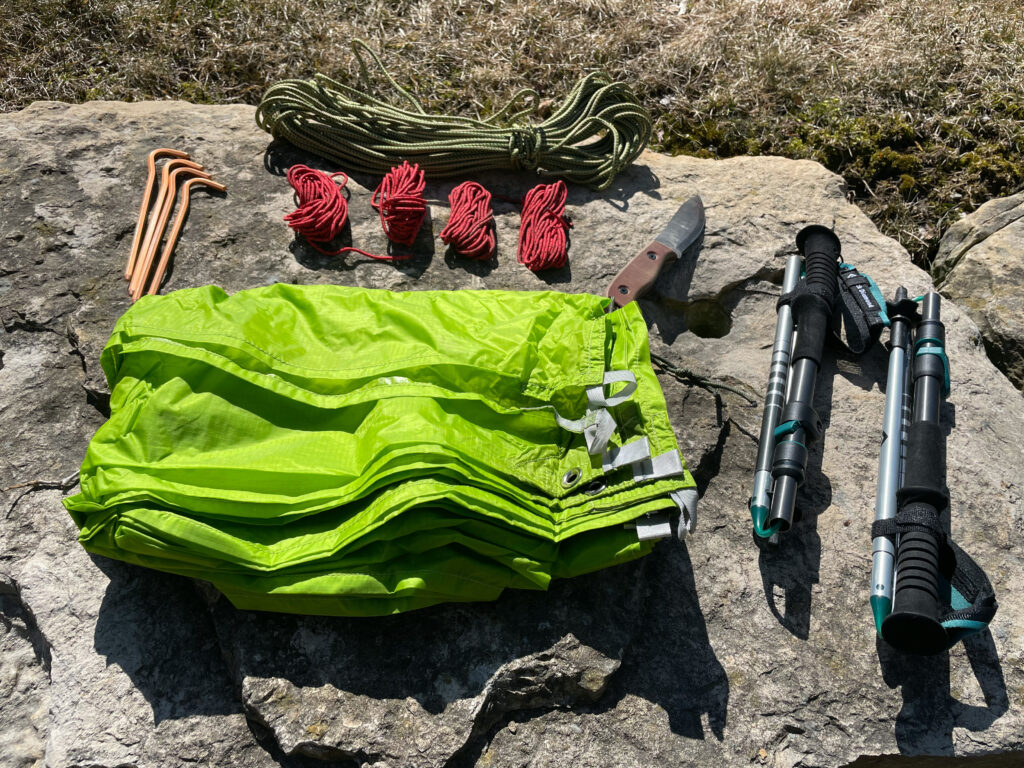
To set up a tarp in any configuration, you’ll need the following items:
Tarp
Tarps are typically made from synthetic fibers – commonly nylon, polyester, and polyethylene, which are strong, moisture resistant, and lightweight.
- Nylon and its variants are typically high strength and lightweight.
- Polyester and its variants are generally more durable.
- Polyethylene is inexpensive, but heavy and not packable.
- Canvas tarps are too bulky for camping use.
To enhance the water repelling performance, manufacturers typically apply a waterproof coating to one side of the tarp. Waterproof coatings are made from polyurethane or a combination of polyurethane and silicone.
For car camping, where weight isn’t an issue, but cost can be, I’d recommend using a polyethylene tarp. If you need to find one online, this tarp on Amazon is a good size (12’ x 16’) and is relatively inexpensive.
For backpackers and backcountry campers, the $70 REI Co-op Trailbreak Tarp (12’ x 12’) is a great option. For its size and performance characteristics it’s the best value.
Alternatively, the next best value option is the Aqua Quest Defender Tarp (15’ x 15’). This tarp is fantastic for larger groups. Its large size can create a massive sheltered area to keep people, equipment, and supplies protected.
Pro-tip: For more in-depth information on tarps, check out my article What Are the Best Tarps for Camping.
Rope
Rope is required to provide the suspension and tension for a tarp. To properly set up a tarp in most configurations, you’ll need 2 sets of ropes.
A single, primary rope is used to hang the tarp. The primary rope is tied around trees at opposite ends to keep the tarp suspended. Because trees can be far apart, I recommend getting at least 100 feet (30 meters) of 3/16-inch nylon static rope.
The secondary ropes are used to tie-down the corners of the tarp to the ground, trees, or other anchor points. These ropes need to be thin, yet strong. You will need 4 ropes of equal length. I recommend 65 feet (20 meters) of 1.8 mm reflective nylon rope. This rope can be cut into 4 pieces, each 16.4 feet (5 meters) in length.
Ground Stakes
Grounds stakes are used to secure the secondary ropes to anchor points in the ground. To set up a tarp, 4 heavy duty stakes are needed.
Pro-tip: Tents typical come with extra stakes which, if not used for your tent, can be used to set up a tarp.
Wooden Sticks or Trekking Poles (Optional)
To prop up the ends of the tarp to give you clearance for certain setups, I use sticks foraged from the forest around my campsite.
Make sure the sticks aren’t too thin, otherwise they’ll bend under the tension of the tie-down ropes. The stick length will depend on the tarp set up and height requirement.
Alternatively, if you’re camping with trekking poles, they can be used in lieu of wooden sticks to prop up the ends of the tarp.
Pro-tip: Interested in purchasing hiking poles? Check out my article How To Size And Use Trekking / Hiking Poles Correctly for in-depth information.
Knife or Multi-tool (Optional)
A dedicated knife or multi-tool with knife is required to shape the ends of sticks so that the tip can fit into the grommet hole in the corners of the tarp, as well as shorten the length of sticks.
Check out How to Pick the Best Knife for Camping or Camping Multi-Tools if you’re looking for one!
Pro-tip: Every tarp set up requires the use of two basic knots to tie-off the ropes – the bowline knot, and trucker’s hitch.
To quickly learn how to tie these knots, check out the 3 Most Useful Knots for Camping.
Basic Fly Tarp Set Up Instructions
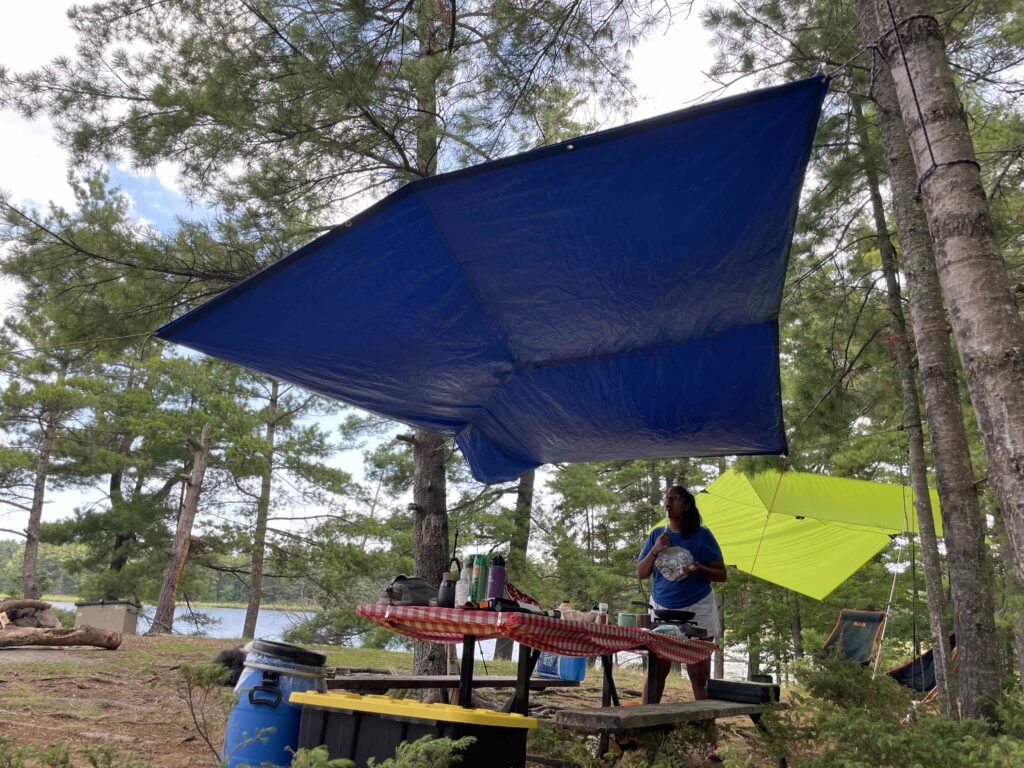
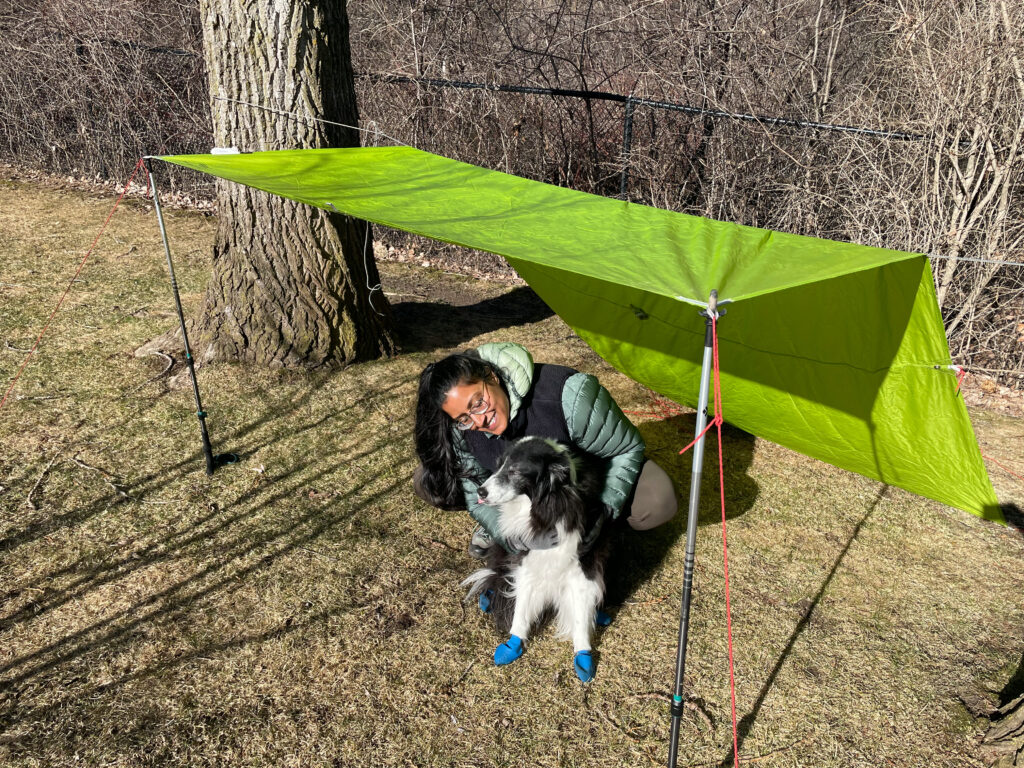
A basic fly tarp set up maximizes the surface area of a tarp to provide a large covered area.
This tarp set up requires at least 4 elevated anchor points to outstretch a tarp. Trees make the best anchor points. However, you can also create this set up on the ground using wooden sticks or hiking poles.
The tarp is fully stretched out at all corners to provide protection from sun and rain. However, since the tarp is positioned flat, this set up provides no protection from the wind.
Weather Protection Ratings
Sun: High
Rain: Medium
Wind: Low
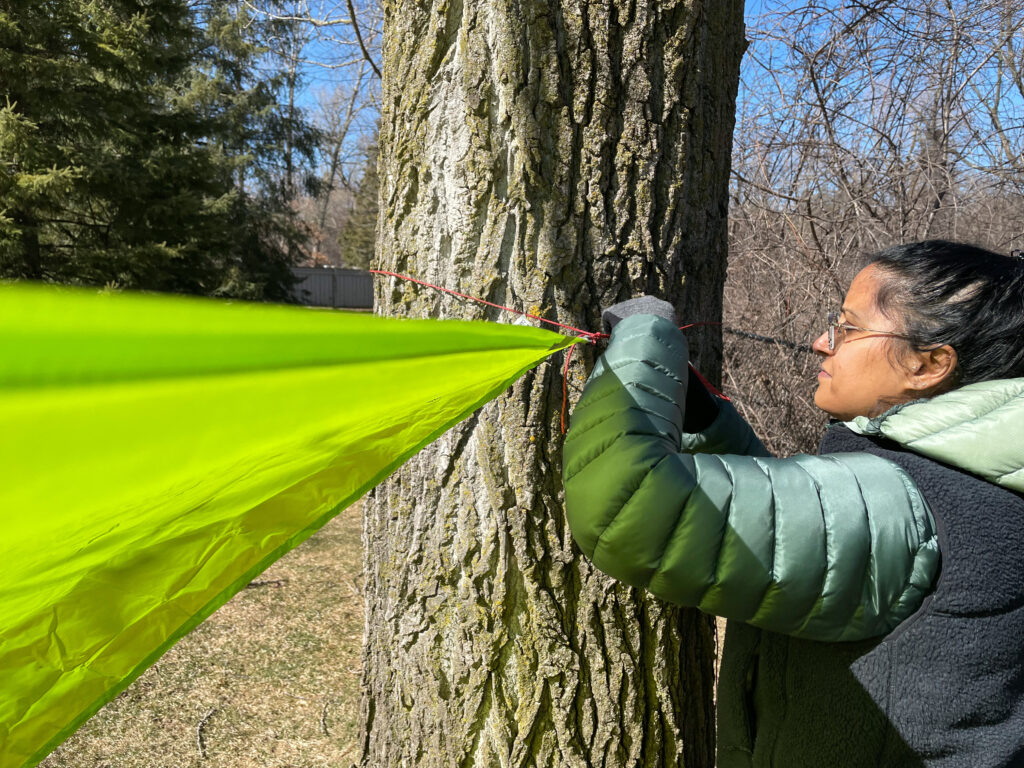
Step 1: Attach Rope to Tarp Corners
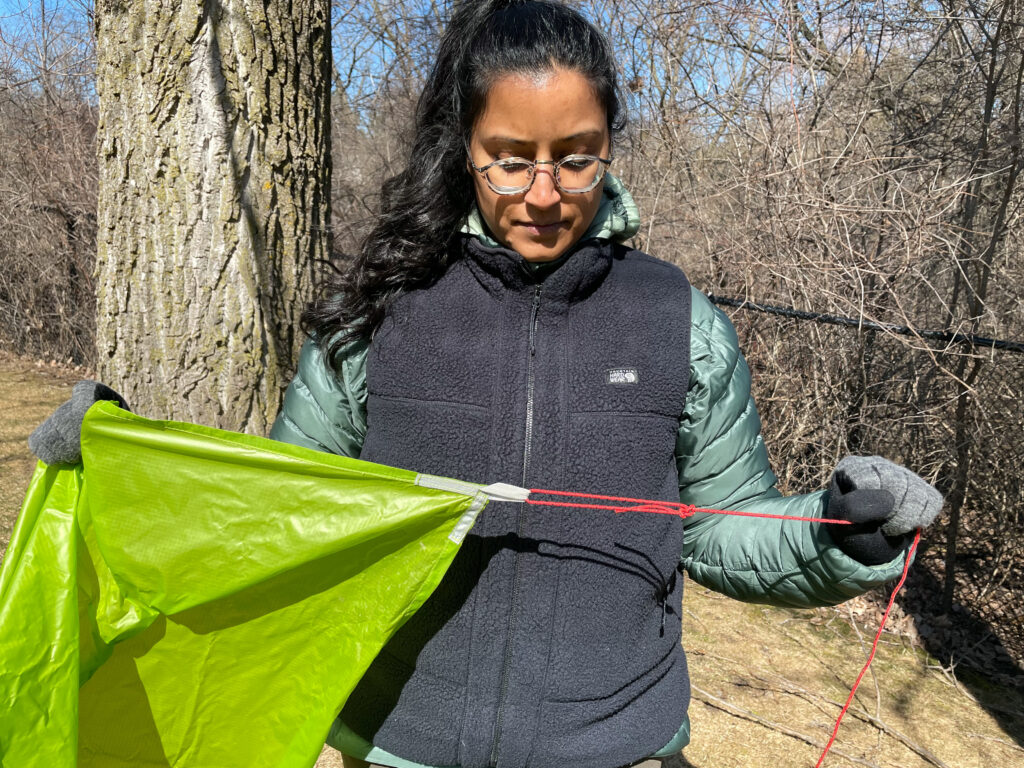
Using the secondary ropes, tie each end to one corner of the tarp through the grommet.
The best knot to use here is a bowline knot since it creates a loop instead of pinching the tarp. A bowline knot can also come undone easily once you’re ready to take down the tarp.
Step 2: Attach Ropes to Elevated Anchor Points
To suspend the tarp, look for 4 elevated anchor points. Most likely this will be trees positioned in a square pattern.
Utilizing a trucker’s hitch, tie-off each rope to a tree. Select an appropriate height so that you have enough head room to easily pass underneath the tarp.
To ensure the tarp sheds rain water, position two of the rope corners slightly higher than the others. This slope helps to keep water from pooling on top of the tarp.
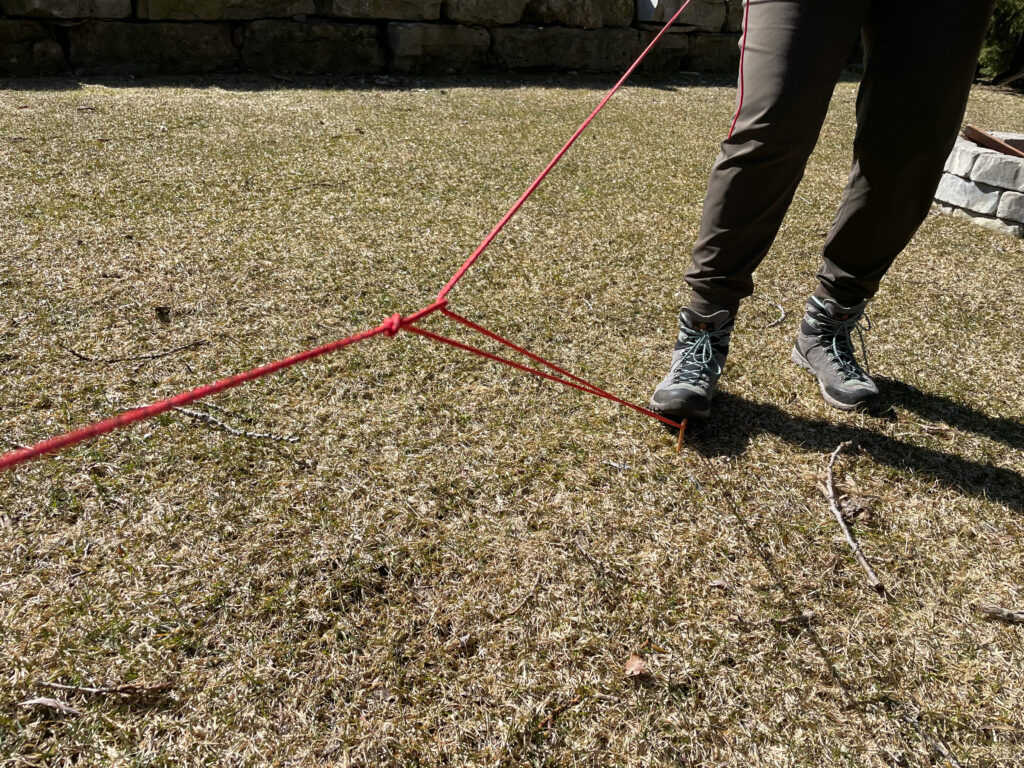
Step 2 (No-Tree Alternative): Attach Ropes to Ground Anchors
If there are limited or no trees, the tarp corners can be suspended using wooden poles or trekking poles along with tension created by ropes anchored to the ground.
Using ground stakes, tie-off each rope end to the ground utilizing a trucker’s hitch. The ground anchors should be positioned in a star pattern.
Each rope should also be fairly loose. The tension will be applied once the poles are position underneath.
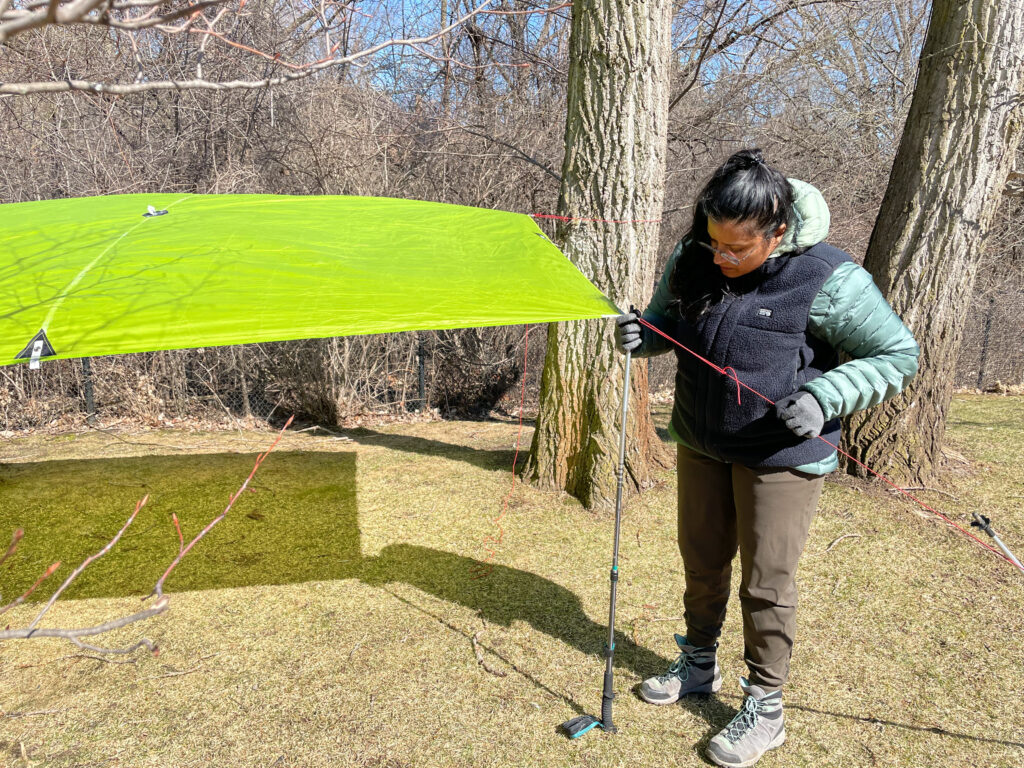
Step 3 (No-Tree Alternative): Prop-up Tarp End Using Poles
Forage for long wooden sticks or use trekking poles to prop-up the corners of the tarp. Wooden sticks need to be thick and strong enough to not bend, buckle, or snap under compressive force.
Pro-tip: Wooden sticks can be cut to roughly the same length using your knife. Also, use your knife to shape the pole end into a point so that it can slide into the grommet hole.
Working from one corner to the next, insert the narrow end of the pole into the tarp grommet. Then push the tarp corner up to create the height required to stand the pole into the ground. If the ground is soft enough, twist the pole into the ground to better anchor it.
Work your way to the next corner and do the same process. Adjust the tension in the anchored ropes to tighten or loosen the lengths to better hold the poles and tarp in place.
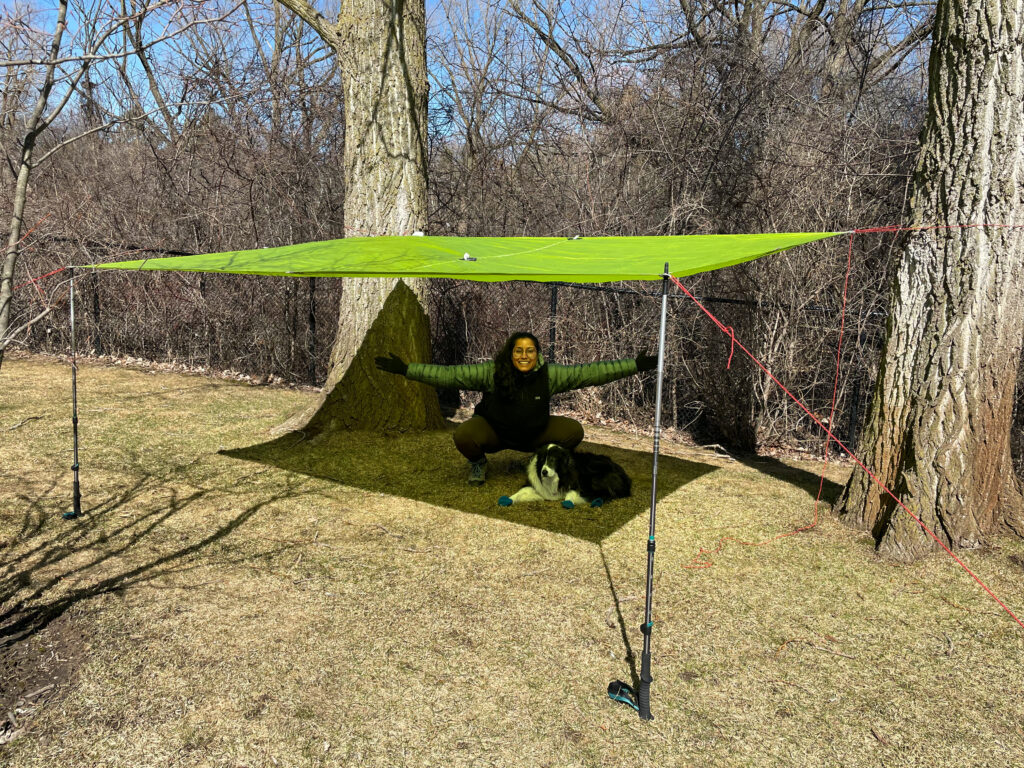
A-Frame Tarp Set Up Instructions
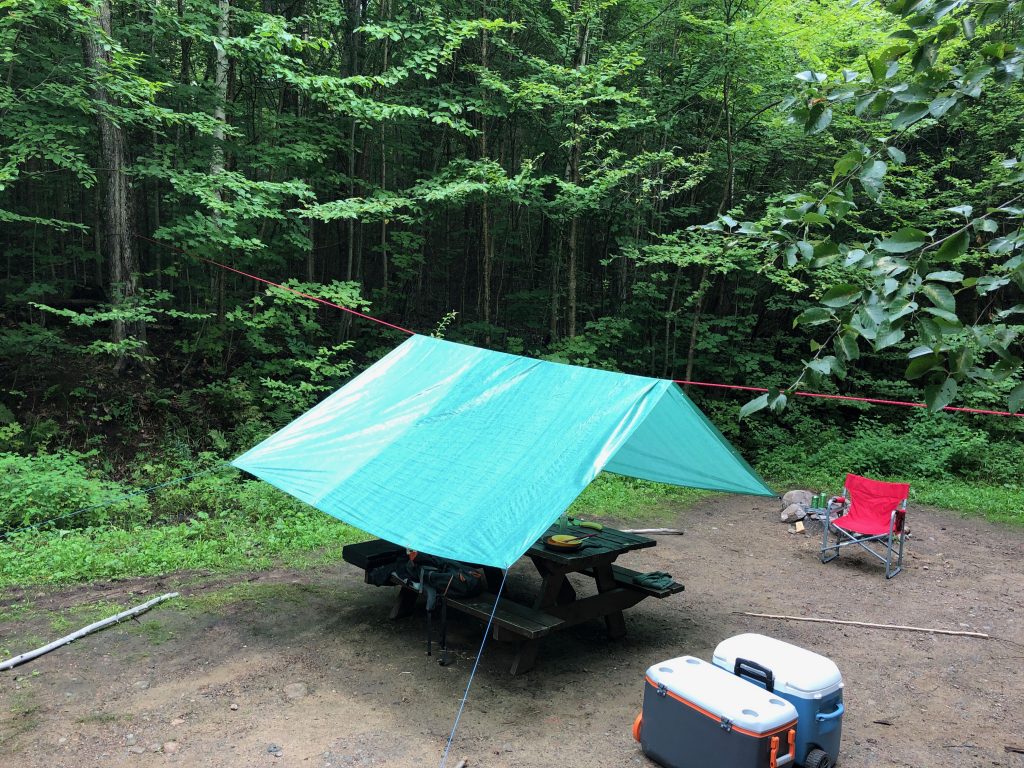
An a-frame tarp set up can provide enhanced rain and wind protect compared to a basic fly configuration.
This tarp set up requires 2 elevated anchor points, and 4 ground anchor points to outstretch a tarp. Sticks or hiking poles can be added to the corners to provide extra head height.
Personally, an A-frame is my go-to tarp set up over a picnic table. It’s quick and simple.
Weather Protection Ratings
Sun: Medium
Rain: Medium
Wind: Medium
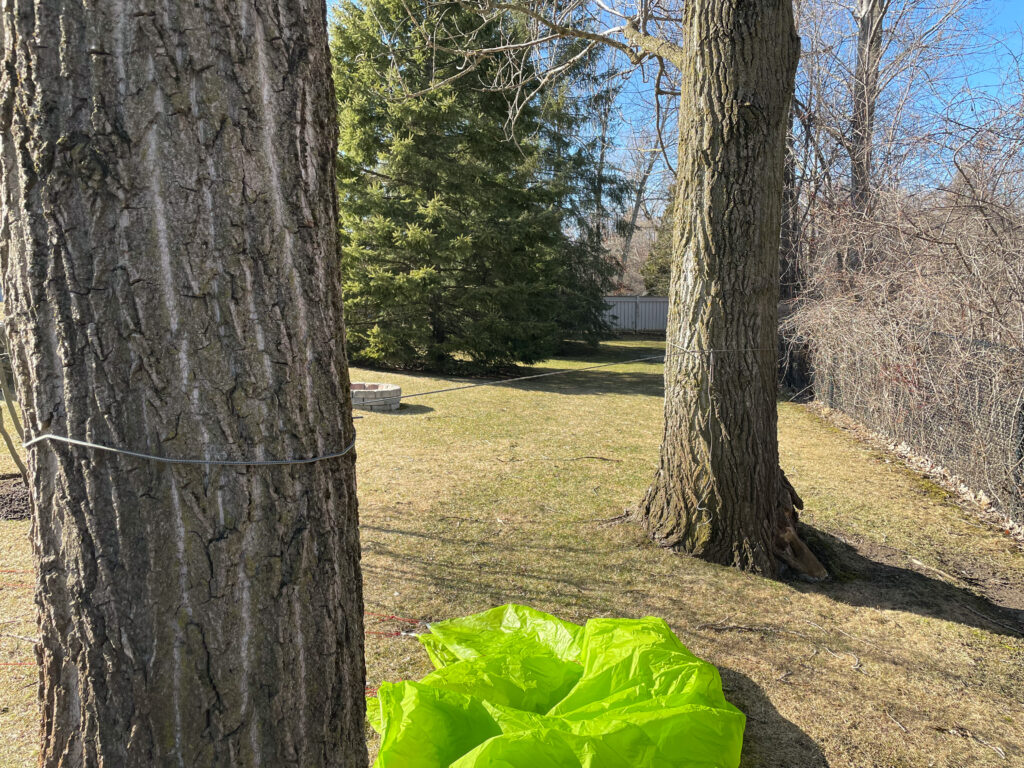
Step 1: Set Up Primary Rope
Look for a spot to set up the tarp between two trees. If you need to, reposition seating and eating areas such as a picnic table so that it is positioned between two sturdy trees.
When tying the primary rope, tie it high enough to ensure lots of head room under the tarp if required.
Use a bowline knot at one end, and a trucker’s hitch at the other end to make sure the rope is tight and doesn’t sag.
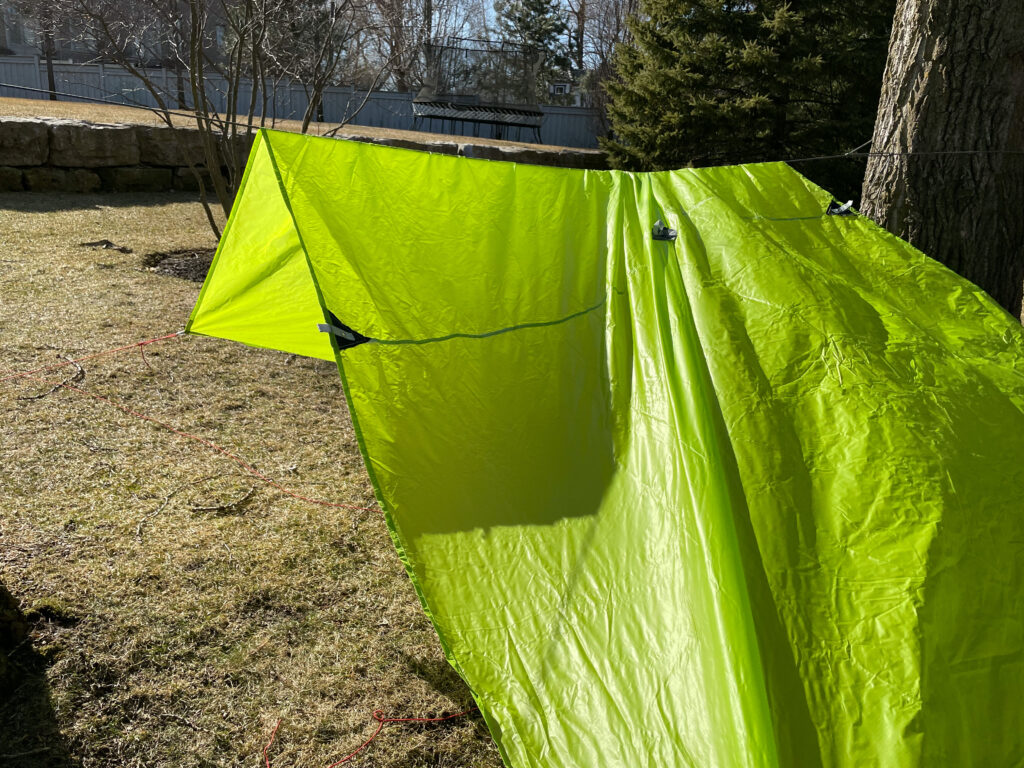
Step 2: Hang Tarp Over Primary Rope
Just like a clothes line, hang the tarp evenly over the primary line. Position the tarp so that it’s centered over the area to be covered (e.g., picnic table).
On each of the four corners, tie the secondary ropes to each of the grommets using bowline knots.
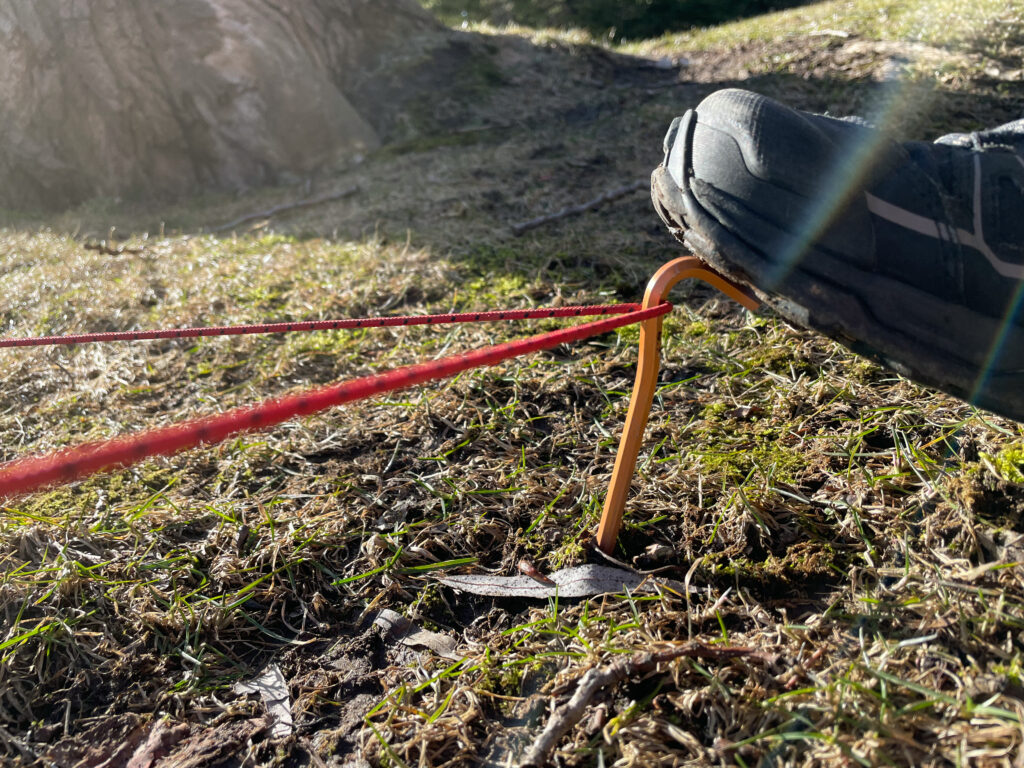
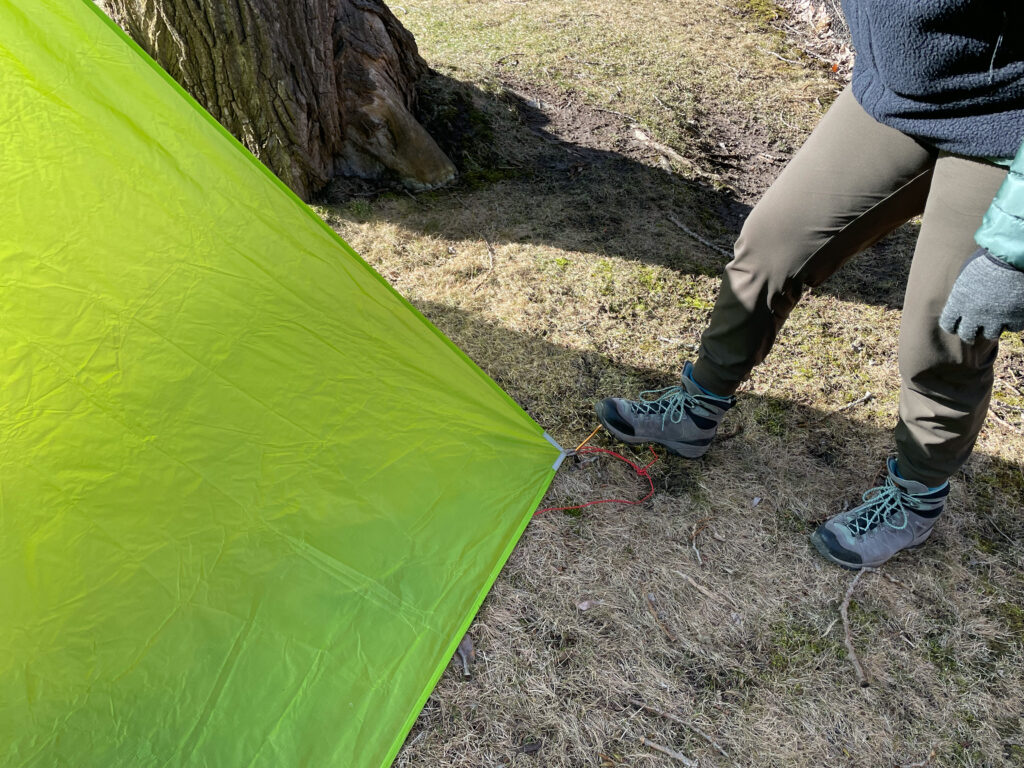
Step 3: Attach Secondary Lines to Ground Stakes
Tie the ends of each secondary line to a ground stake. Using a rock, pound each stake into the ground.
Pro-tip: Angle the stakes so that the tip into the ground is pointing back towards the center of the tarp. This prevents the stakes from pulling out.
When hung and staked out, the tarp should look like an “A”. The ropes don’t need to be super tight yet – they will be tightened later.
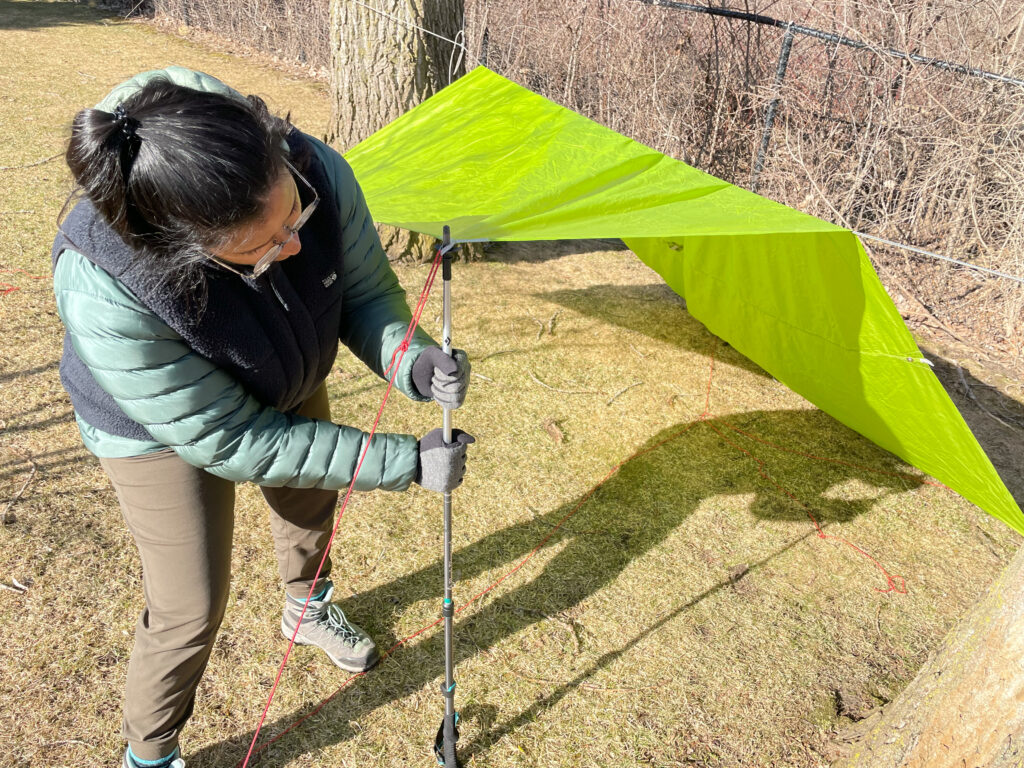
Step 4: Support Tarp Corners with Sticks or Poles (Optional)
Measure and cut 4 sticks of roughly equal length. Using a knife, shave the tips of each stick so that 1 inch can fit into the tarp grommets. Alternatively, open trekking poles, and insert the tip end into the grommets.
Place each tip inside the grommet, lift the tarp and position the sticks under each corner. If needed, tighten each secondary line to ensure the tarp is taut on each corner.
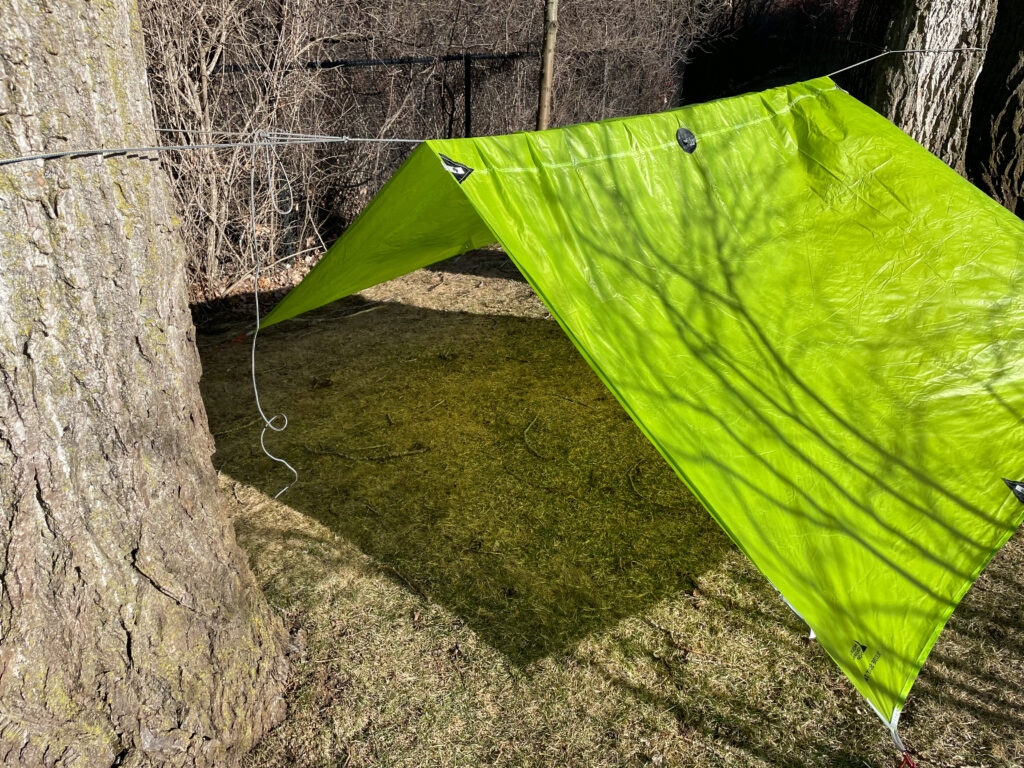
Lean-To Tarp Set Up Instructions
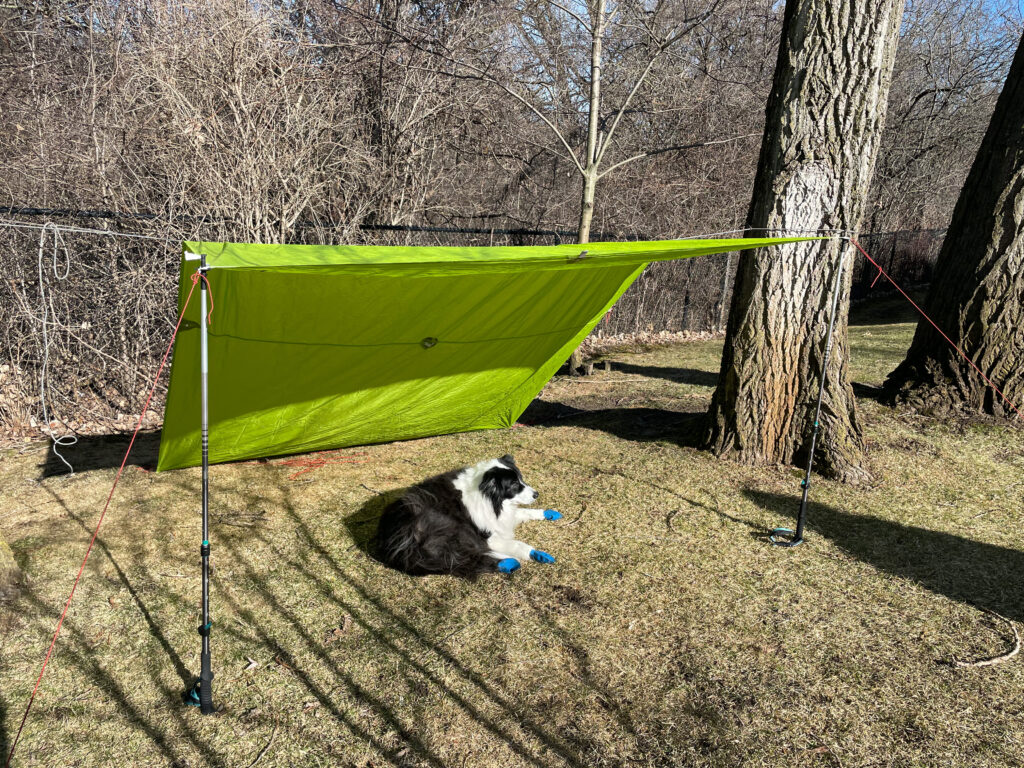
A lean-to tarp set up can provide exceptional protection from high winds compared to a basic fly or a-frame configuration. It’s also very easy to set up and great for as a survival tarp set up.
A lean-to tarp is positioned at roughly a 45-degree angle to the ground to block wind and deflect rain.
Similar to an a-frame, this tarp set up requires 2 elevated anchor points, and 4 ground anchor points to outstretch a tarp. However, no sticks or hiking poles are required.
Weather Protection Ratings
Sun: Medium
Rain: Medium
Wind: High
Step 1: Set Up Primary Rope
Look for a spot to set up the tarp between two trees.
When tying the primary rope, the rope height should be high enough to create the top-end of a 45-degree slope with the tarp and the ground.
Here is a quick guide for the proper primary rope height for different tarp lengths:
| Tarp Length | Line Height |
|---|---|
|
8′ |
4′ |
|
10′ |
6′ |
|
12′ |
8′ |
|
15′ |
10′ |
Use a bowline knot at one end of the rope, and a trucker’s hitch at the other end to make sure the rope is tight and doesn’t sag.
Step 2: Hang Tarp Over Primary Rope
Hang the tarp over the primary line. However, unlike an a-frame, for a lean-to set up only about 1 to 2’ of the tarp should be hanging over one side and the rest over the other side.
Then, position the tarp so that it’s centered over the area to be covered (e.g., sleeping area, picnic table).
On each of the four corners, tie the secondary ropes to each of the grommets using bowline knots.
Step 3: Attach Secondary Lines to Ground Stakes
Tie the ends of each secondary line to a ground stake. Using a rock, pound each stake into the ground.
Pro-tip: To fully protect against wind, anchor the long end of the tarp directly into the ground without a gap.
When hung and staked out, the tarp should look like an “L”.
Step 4: Support Tarp Corners with Sticks or Poles (Optional)
Measure and cut 2 sticks of roughly equal length. Using a knife, shave the tips of each stick so that 1 inch can fit into the tarp grommets. Alternatively, open trekking poles, and insert the tip end into the grommets.
Place each tip inside the grommet, lift the tarp and position the sticks under each corner. If needed, tighten each secondary line to ensure the tarp is taut at each corner.
This article contains affiliate links, which help support this blog at no cost to you!