Knowing how to tie specific knots while camping is definitely an asset. I believe that utilizing your rope effectively, as well as applying proper knots, is one of the many fundamental camping skills everyone should master.
Practically speaking, tying the correct knot can make hanging tarps, securing canoes, joining different lengths of rope, or securing a rope wrapping easier, safer and stronger.
So, let’s review how to tie the 3 most useful knots for camping, and how these knots can be applied to different situations.
Having a fixed loop at the end of a rope can be extremely useful while camping. That’s because a fixed loop can be used for a variety of tasks including:
Latching a rope end onto an anchor point
Attaching a rope end to a carabineer
Having the standing end of a rope loop through the knot to create a bigger loop to synch around large objects such as a tree trunk
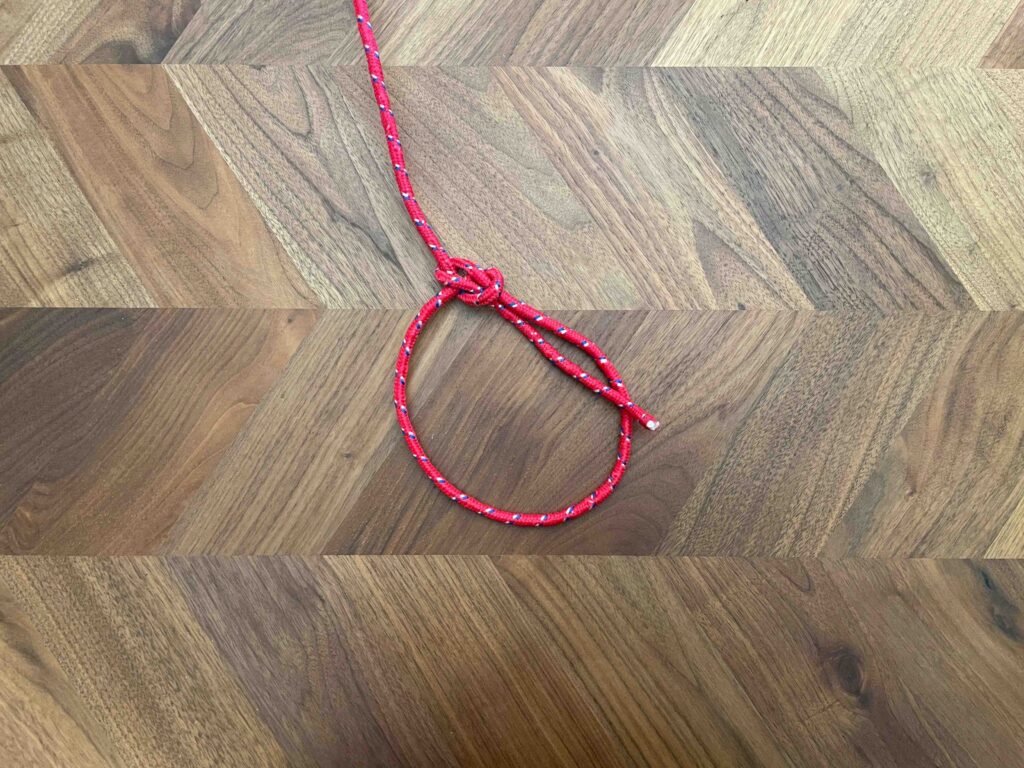
There’s no debating that the best knot to create a fixed loop is the bowline knot. The bowline knot is widely used for fixed loops because it is both very easy to tie and untie even after being under tension.
How to Tie a Bowline Knot
Tying a bowline knot is fairly simple – just follow these 5 steps:
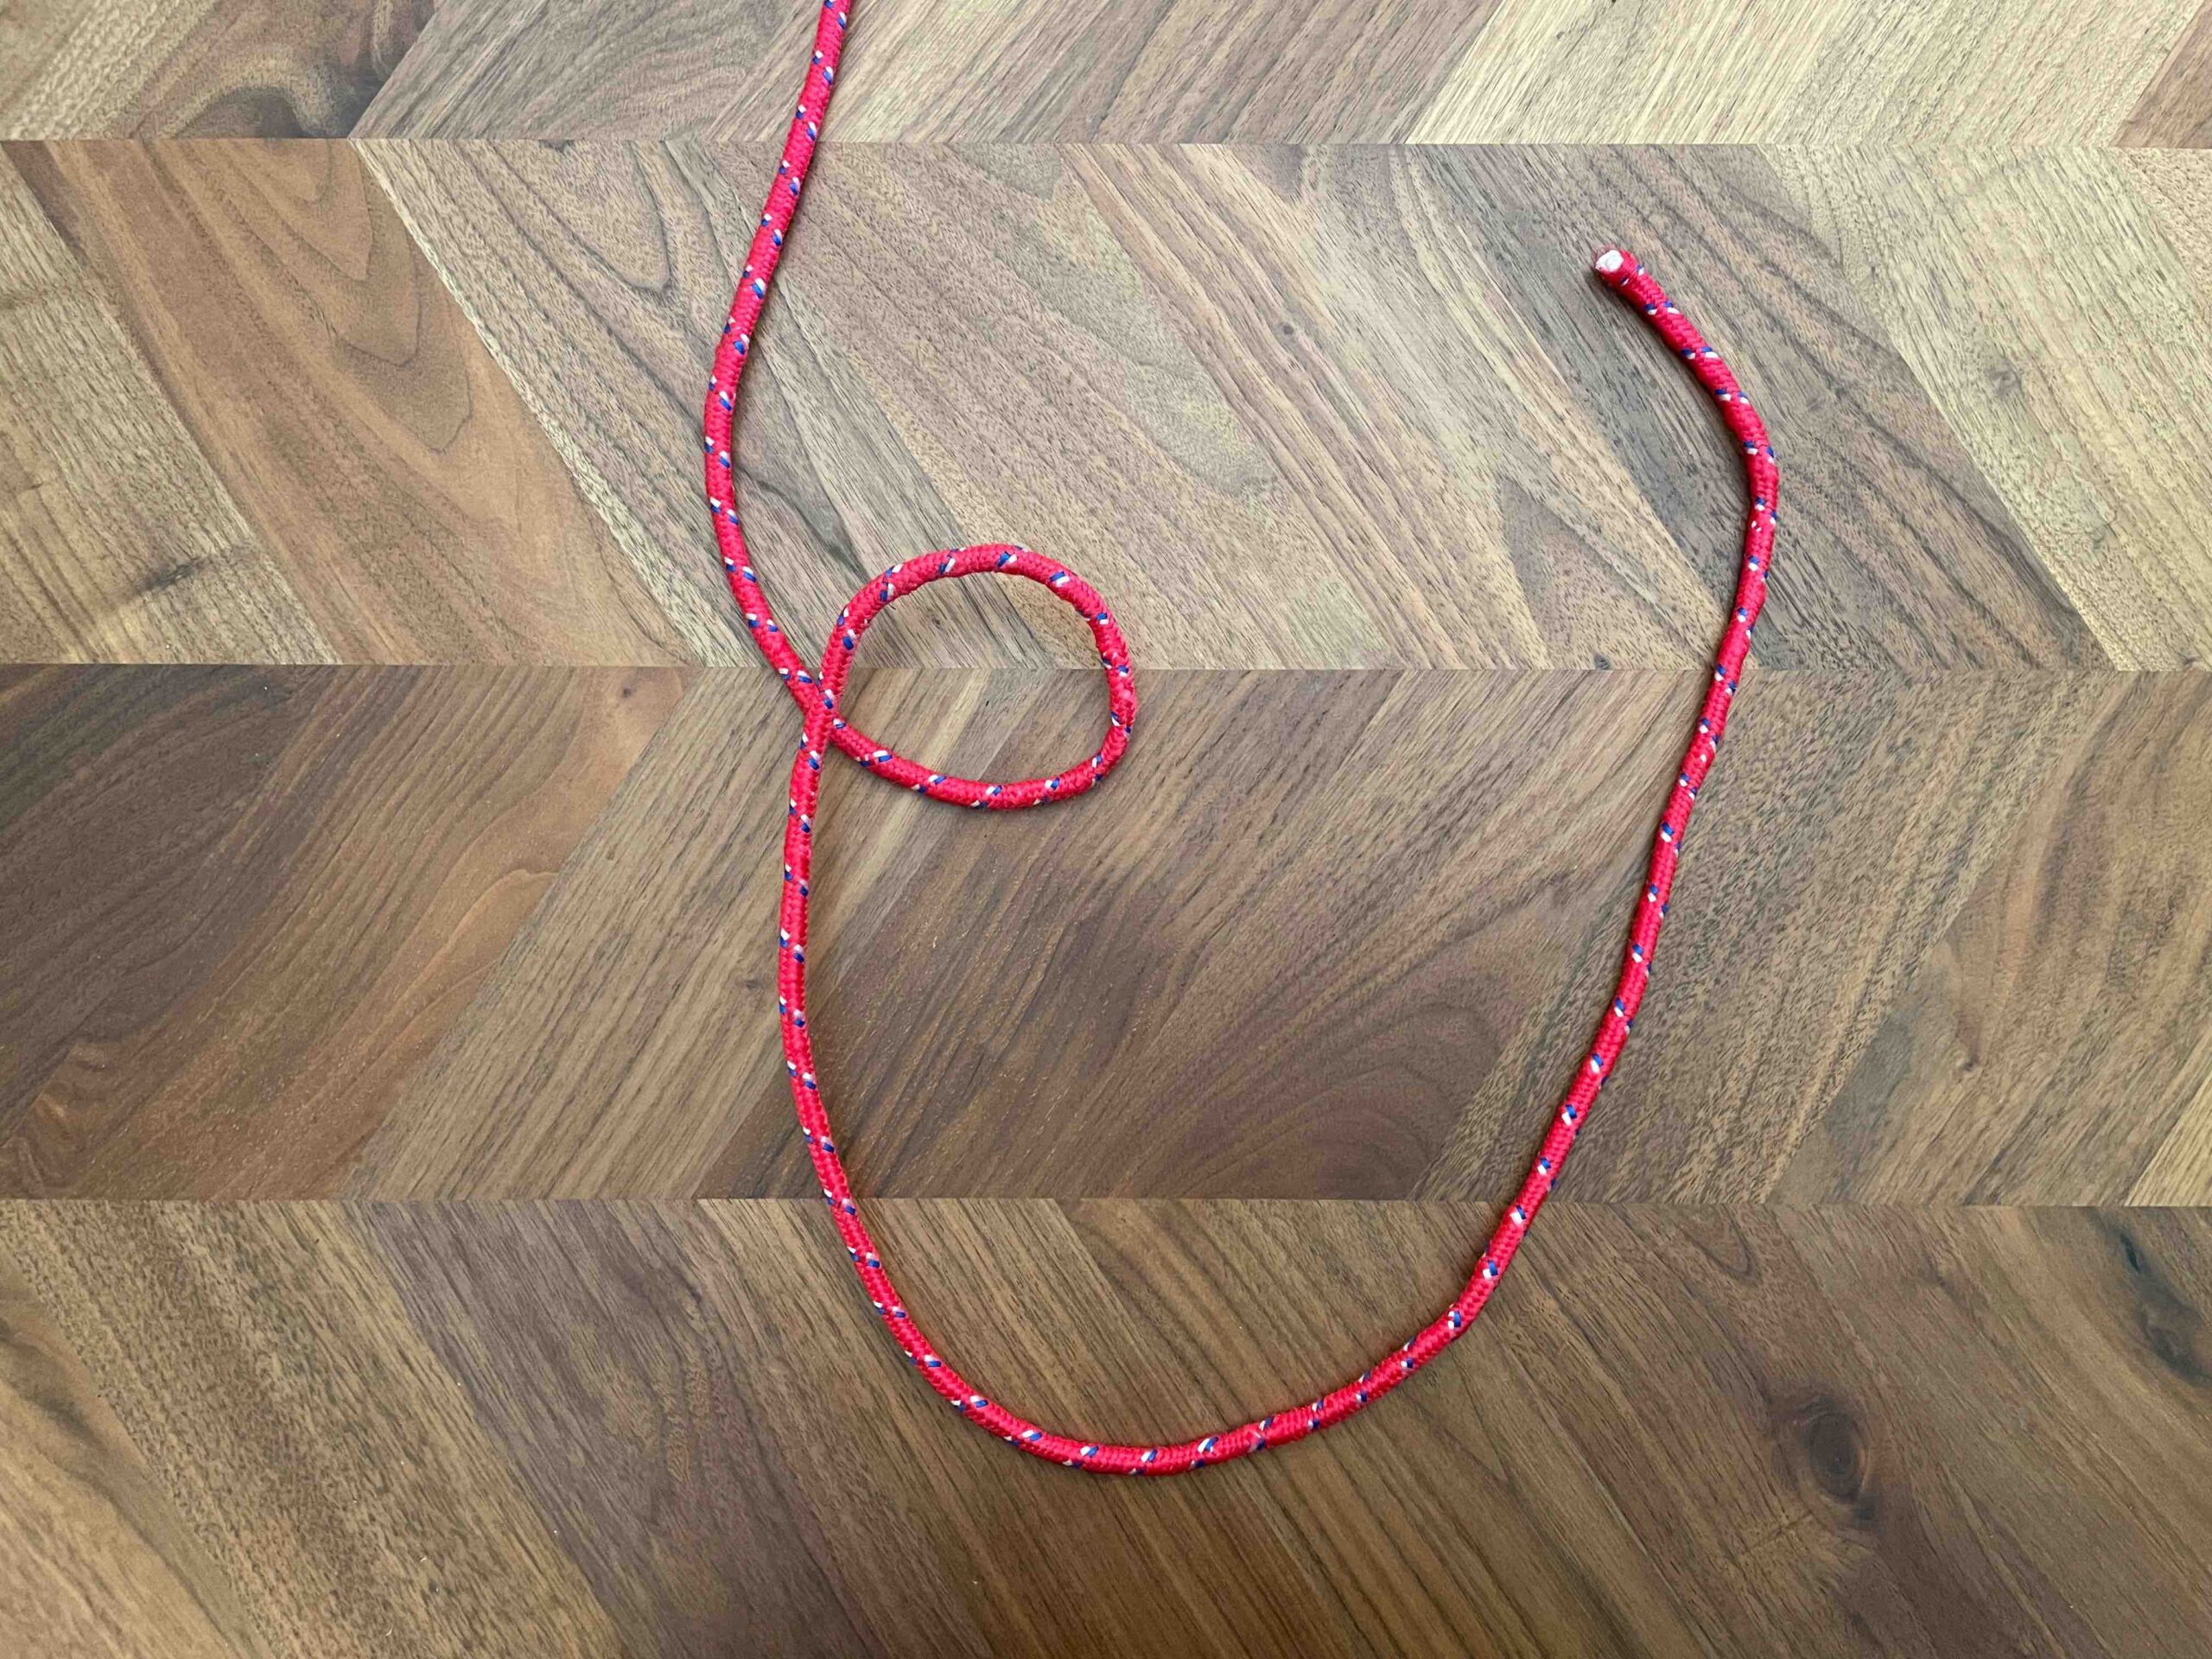
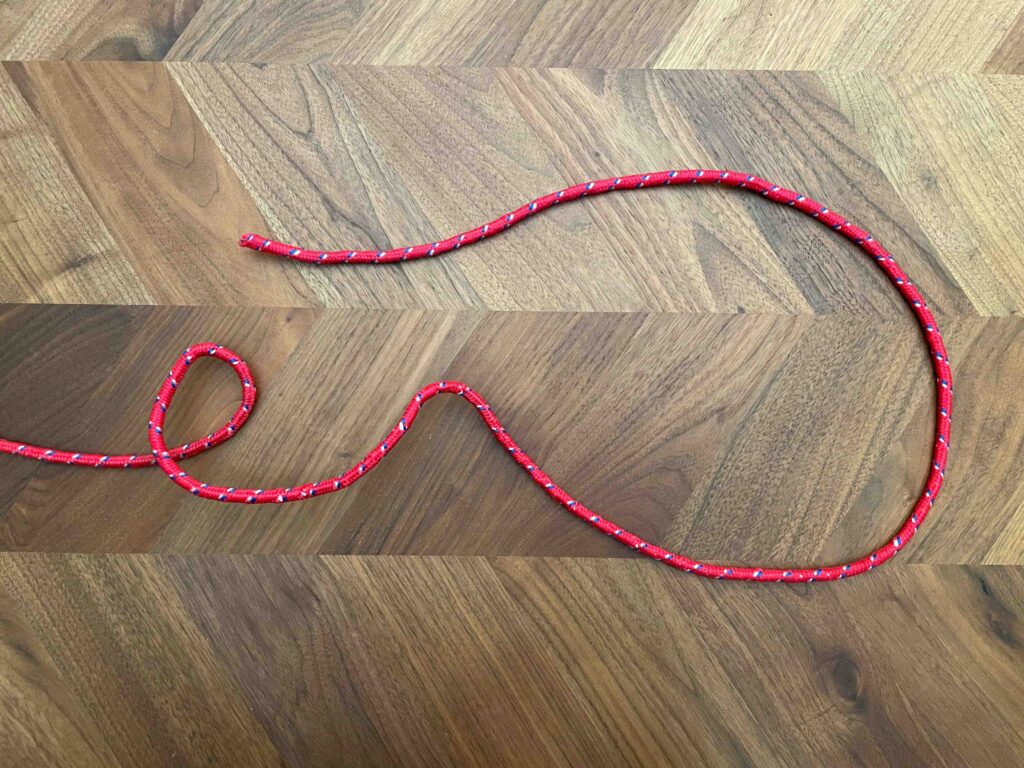
Step 1 - Make a half twist in the line. In this case, the twist is twisting away from the bottom.
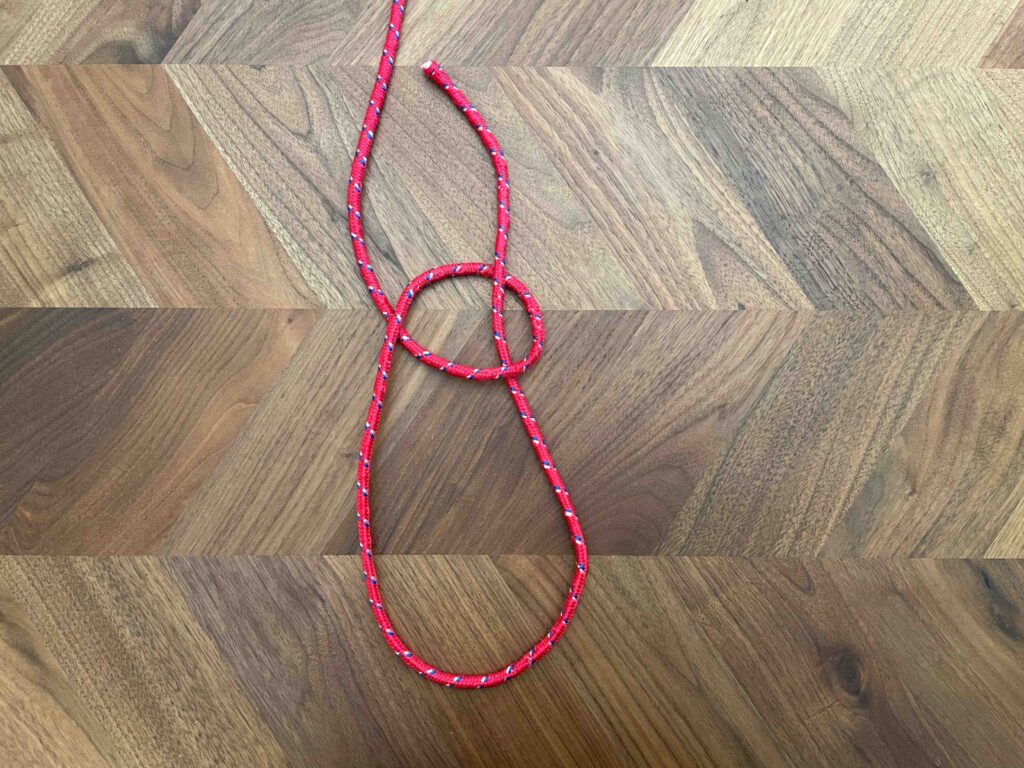
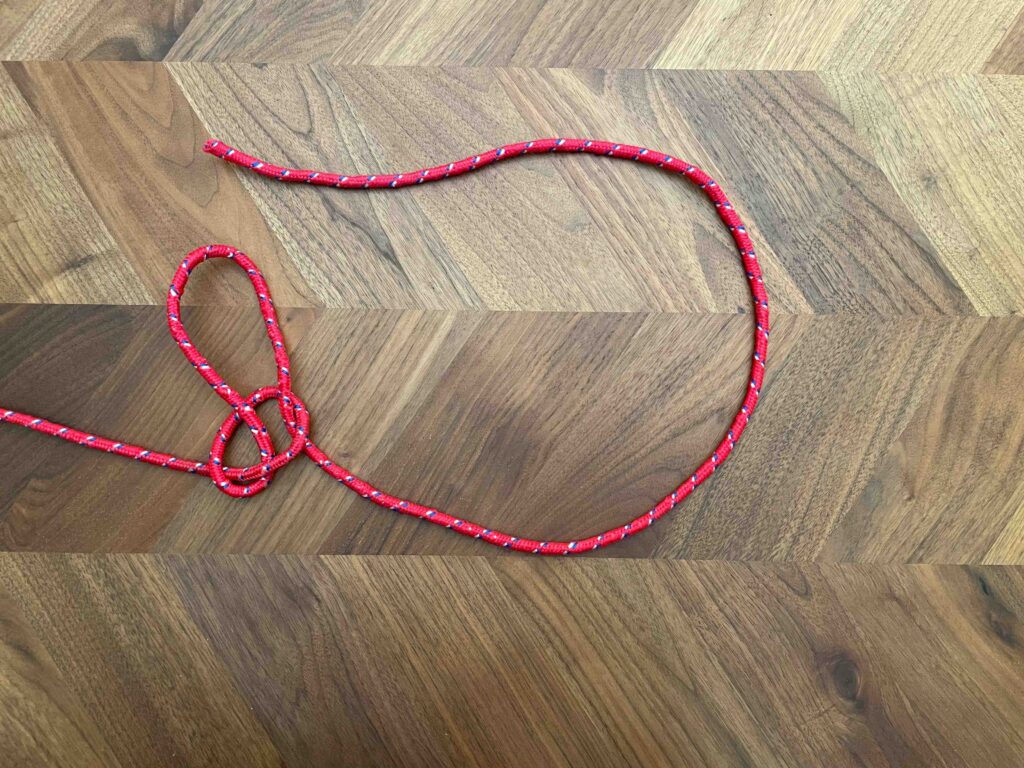
Step 2 - Feed the free end through the twist from behind
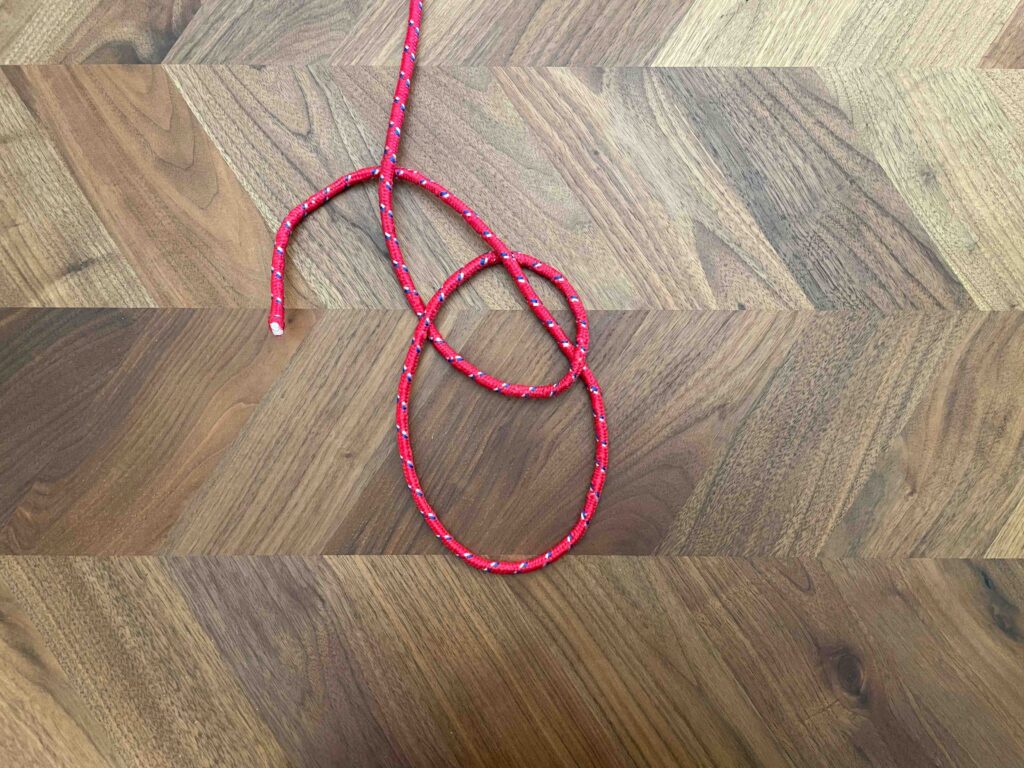
Step 3 - Loop the free end around the standing end
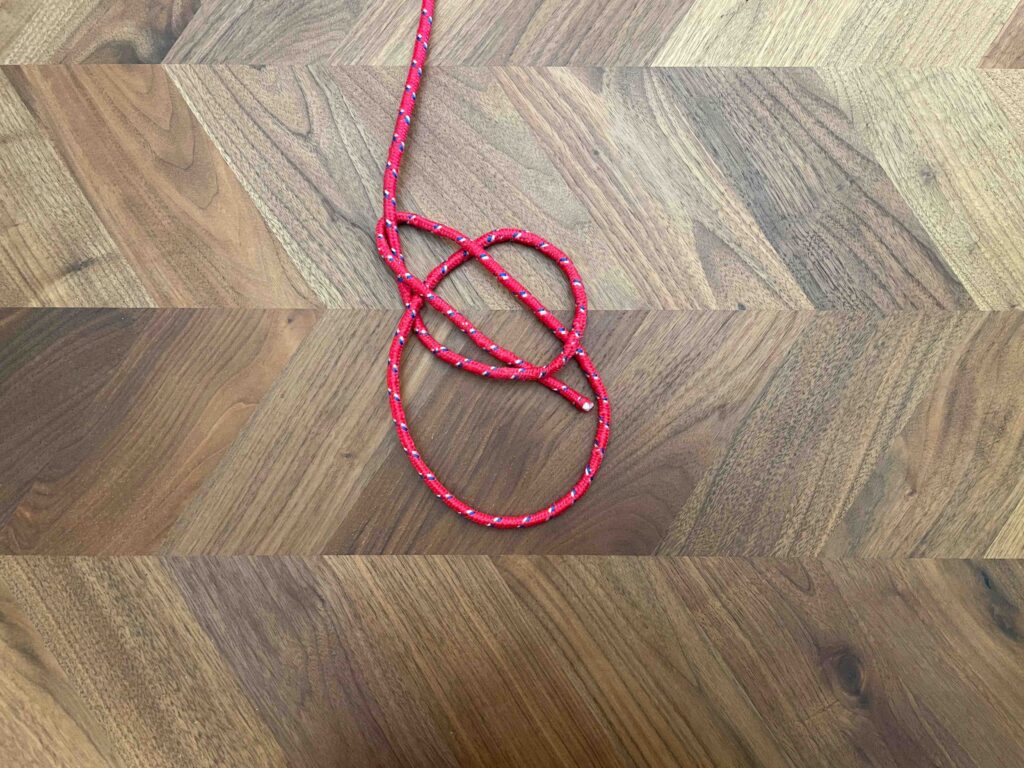
Step 4 - Feed the free end back through the twist
Step 5 - Hold the free end and pull the standing end to tighten the knot
2. Sheet Bend: Connecting Two Ropes Securely
Joining lines of rope together can be invaluable while camping. That’s because by securely joining two ropes you can effectively extend their length and reach.
Instead of carrying one extra long continuous length of rope, you can combine and deploy smaller lengths of rope which can be more efficient.
A couple useful examples of joining ropes while camping are combing two or more smaller ropes to hang a tarp or to a hang a food barrel while in bear country. This is where a sheet bend knot can come in very handy.
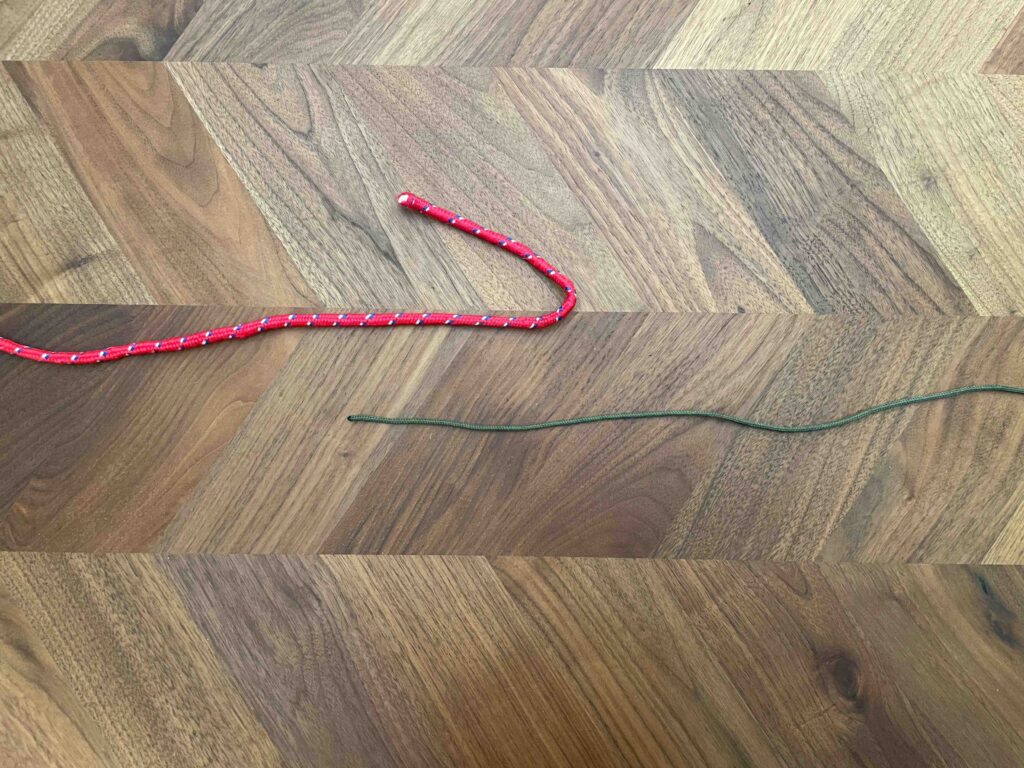
A sheet bend is an essential knot that allows you to securely and easily join two ropes together. The sheet bend knot is versatile since it allows for the joining of lines of different diameter.
So, if you have a mix of short cordage, be it paracord, nylon or polypropylene rope, you can use a sheet bend knot to tie them together, even if they are of vastly different thickness.
How to Tie a Sheet Bend
Tying a standard sheet bend can be done fairly quickly – just follow these 4 steps:
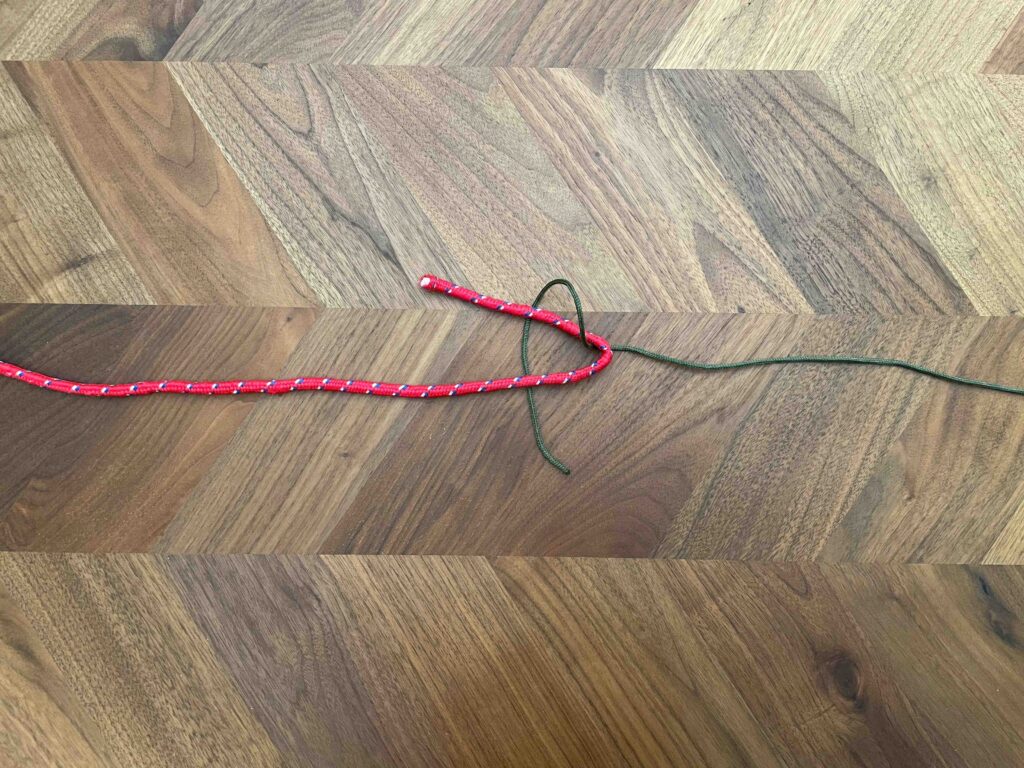
Step 1 - Make a bight in the larger diameter line.
Step 2 - Feed the free end of the smaller diameter line through the bight.
Step 3 - Pass the free end of the smaller diameter line around the bight and then back under itself but not through the bight.
Step 4 - Pull the standing ends of both lines so that the sheet bend tightens at the end of the bight.
3. Trucker’s Hitch: The Rope Tensioning King
Knowing how to remove all the slack from a line is important, especially if you’re securing something for transport like a canoe or securing a tent or tarp in windy conditions.
A taut line maximizes the strength of a rope and imparts that strength into friction, inward pressure, or tension which holds the item in place.
While camping, taut lines are useful when setting up tarps, anchoring tent guy lines, or strapping items to vehicles roofs or trailers. Taut lines maintain tension and prevent movement under dynamic loads.
But, creating tension in a line can be difficult without some sort of leverage or mechanical advantage. That’s where the trucker’s hitch comes in incredibly useful.
A trucker’s hitch is a compound knot that consists of a slip knot applied to the standing portion of the line. The free end is then looped around an anchor point and fed through the slip knot which is then pulled taut.
A trucker’s hitch allows for the transfer of tension applied to the free end, around the anchor point, and into the standing end.
A single tensional force required for the standing end of a line is divided into three portions – two lines from the trucker’s hitch to the anchor point, and one line from the knot to your hand. This (mathematically) triples your pulling force and allows for very high tension to be applied to the standing line!
How to Tie a Trucker’s Hitch
Tying and using a simplified version of the trucker’s hitch is broken into three parts:
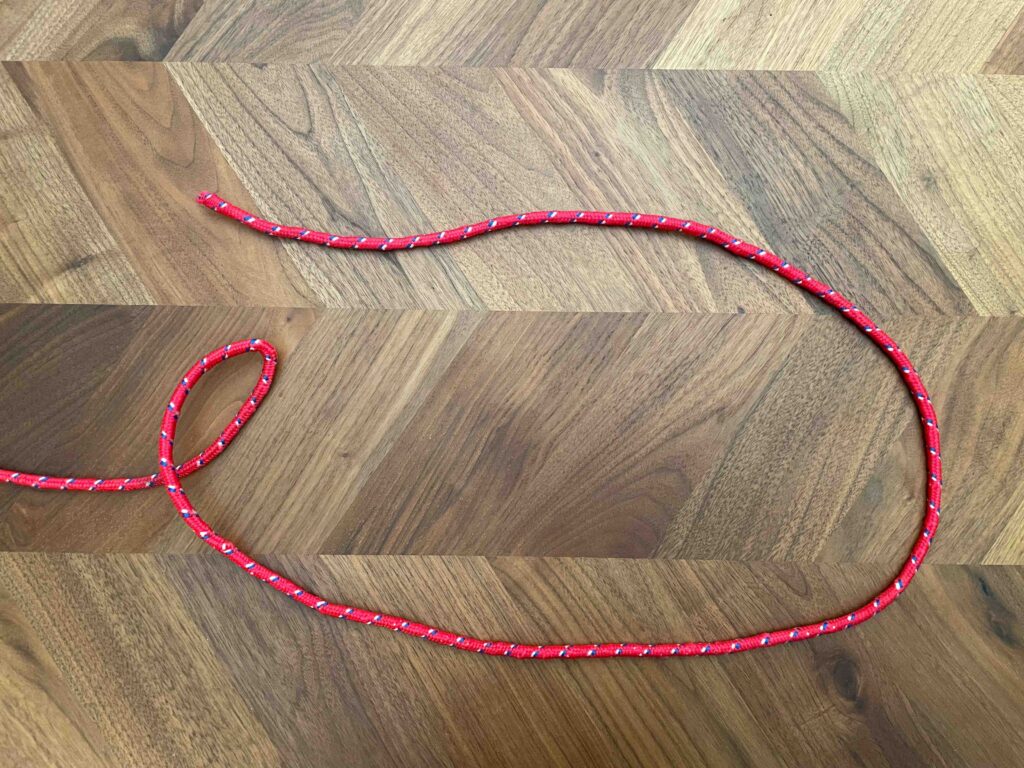
Part 1 – Create the Slip Knot
Step 1.1 - Choose a location along the standing end of the line where the knot will be made. Make a loop in the standing end of the line at this location.
Step 1.2 - Make a bight in the free end portion of the line just after the loop. feed it through the back side of the loop.
Step 1.3 - Feed the bight through the back side of the loop.
Step 1.3 - Hold the standing end and pull the loop. This creates a slip knot.
Part 2 – Anchor, Loop and Apply Tension
Step 2.1 - Loop the free end of the line around an anchor point and feed it through the slip knot once. (Looping the free end around twice creates more friction which helps prevent the line from slipping while under tension)
Step 2.3 - Pull the free end toward the anchor point to start creating tension in the entire line.
Part 3 – Lock the Tension
Step 3.1 - To “lock” the tension in the system, pinch the slip knot where the free end wraps around it.
Step 3.2 - Wrap the free end around the line from the slip knot to the anchor point.
Step 3.3 - Feed a bight of the free end through the loop opening created .
Step 3.4 - Pull the bight taught. The line is now "locked". To unlock the system, pull the free end to release the slip knot.
[Bonus] Back Serving: The “Boa Constrictor”
How to Back Serve
“Serving” is a widely used stringing technique in archery and bow making. Back serving is essentially a way to use lock a string in place so it doesn’t slip free.
For camping and survival, knowing how to serve and back serve rope can be very beneficial. It can be used to securely lash two things together or, in my case, even repair a broken and splintering fishing pole.
The concept of serving relies on wrapping a line around and around an object.
The tensional force of wrapping creates friction which keeps things snuggly in place.
However, wrapping a line alone won’t do any good since there needs to be a way to “lock” the ends of the line in place so it doesn’t slip free and unravel. This is where back serving comes into play.
Back serving relies on wrapping the line around itself and the object. Pulling on the wrapped line adds tension to the end which keeps the line from unravelling.
The best explanation of serving and back serving is by WheeliePete via his YouTube video which I’ve linked to below.
I watched his step-by-step guide and it helped me learn how to serve my own bow string as well as repair my fishing rod after it snapped while I was solo camping.
This article contains affiliate links, which help support this blog at no cost to you!